WHY SPEND THOUSANDS?
BUILD YOUR OWN COMPOSTING TOILET
COMPLETE WITH URINE DIVERTER
The fact is the toilet is one of the most used pieces of, let’s call it, “furniture” in the house. When we start talking about the toilet for the Wanderlust Bus we wanted to make sure whatever we chose would meet some specific requirements. The unit needs to be attractive, movable, cleanable, built with easily replaceable parts, and comfortable. The only thing that meets all of those requirements concurrently is a DIY composting toilet, handmade to our specs.
We begin our search, as always, researching the other commercially available options. We found some consistent factors, but none of them were good.
PROBLEMS WITH COMMERICAL COMPOSTING TOILETS
- EXPENSIVE – Even though there are a number of options available, none are what one could consider “budget-friendly” composting toilets. Prices vary wildly but a good average is right around $1000. A grand for a container for me to poo in seems ridiculous. The solution – DIY composting toilet.
- BULKY – The commercial composting toilets are also VERY large. Some have a very large footprint. Granted, there are some that have a footprint that is very similar to the one we are making here but ours doesn’t require room to turn some handle. The solution, again, is a DIY composting toilet.
- UGLY – Let’s face it, a toilet isn’t necessarily going to be an art piece, but the commercial units are almost all eyesores. Molded plastic, weird shapes, collection containers in plain view, all of these things are why people have a negative connotation of composting toilets in general. Solve all these issues, you guessed it, by building a DIY compositing toilet.
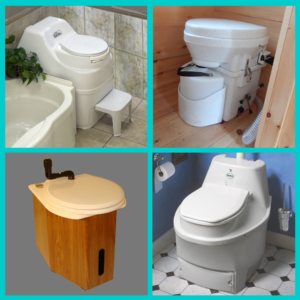
Our DIY composting toilet solves all of these issues and has all of the features that the best commercial batch units have.
We started by finding a seat that we really liked. We are choosing a seat that also has an integrated child seat built in. This cuts down on the ability for it to get lost, damaged, or intentionally thrown in the toilet by a little. We went with a Bemis Next Step Elongated Seat with slow close lid and integrated potty seat (you can find it here).
We also had to find a urine diverter. The reason for this is that if you separate #1 and #2 you can significantly cut down on the offensive smells that emanate from the unit. The urine diverters that are readily available are all plastic, cheap, and could easily be considered disposable and that is something we are trying to avoid.
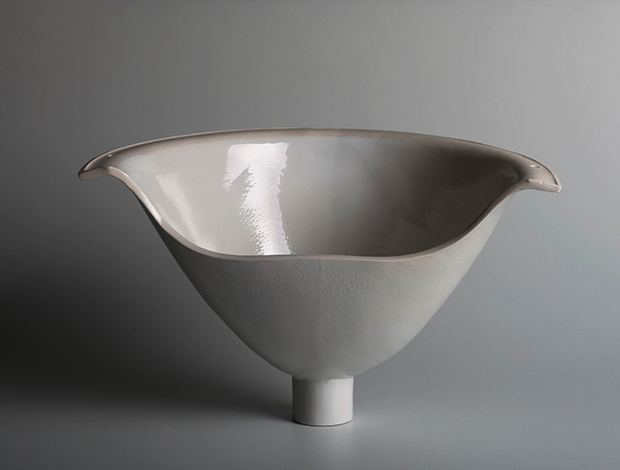
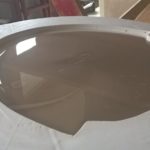
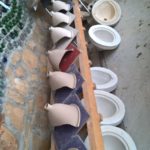
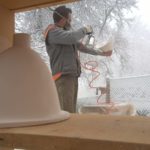
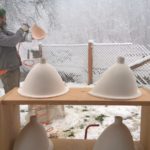
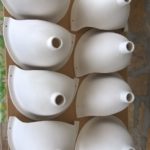
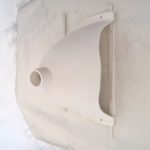
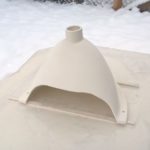
Fortunately, we found a solution. All the way over in Serbia, there are a couple artists in an Earthship who solved our issue. The Marcel is a handmade porcelain urine diverter and it’s truly a sight to behold. I know this sounds extreme for something that is essentially a pee funnel but it’s true.
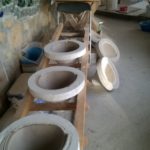
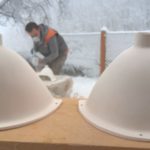
Smilja and Bojan are those artists and are just that. They handmake these in small batches and ships them all over the world. If you want to know more about the Marcel urine diverter you can check out the website, here. You can also see some images showing the production process below.
Smilja and Bojan are also a big part of Earthship Serbia, the first earthship in Serbia and they are showing their region that there are other options to build your forever home than traditional sticks and bricks. You can find more about their work on Earthship Serbia’s Facebook page.
After receiving our special deliver from Serbia, no thanks to the postal strike…lol. We moved on to putting everything together. Barrel staves for the sides to keep the ply top and bottom supported then wrapped up in white metal sheeting and covered in EcoPoxy.
It was a learning process and it turned out better than we could’ve imagined. Check out the video below for how we did it and the final product is sitting right over there. If you have any questions when you start building your DIY composting toilet, feel free to ask and I’ll be glad to help.





Hello!
Great video on your composting toilet build! I’m building one for our bus and was curious to know what you used for your urine container.
Thanks!
We used a porcelain urine diverter from Serbia.
Nice build of a toilet box.
How do you remove the compost bucket? You commented that you were installing a rear wall. Typically one would expect the top of the box to hinge upward so the box remains in place. That doesn’t seem feasible with your design.
The Urine Separators cost over $100. They look excellent but expensive.
Hey Ana, the bucket is removed from the rear of the toilet. It makes it so there’s no top hinge but does give it a better look. This also allows for the entire cabinet to be coated and sealed so that none of the wood can harbor any nasties!
Hi johnny, I think what Jessica was asking is what does your diverter drain into?
Hey Chuck, the toilet drains into some tubing that then diverts into the bay of the bus where we have a 5-gallon diesel (cause it was yellow) can. We then empty that every couple of days into a rest stop toilet or somewhere into the ground. FYI, the urine into the ground is spectacular for the earth, our planet is seriously lacking nitrates in the soil.
This is the best DIY site on composting toilet builds. Certainly beats plucking down $800 – $2,000 for ready made. Thanks!
Thanks, Tom, I appreciate that and that is precisely the reason I decided to build my own. It’s crazy to take up that much footprint for that much of my wallet contents.
Hi Johnny,
We talked a while back and you had mentioned that you were going to use the same sheet metal you used on your toilet to clad your shower walls. Just wondering if you did that and how it is holding out? Do you mind letting me know how you attached it and if you had some waterproofing down before putting up the sheet metal.
Thanks so much for all of your help.
Kris
Hey Kris, We did use it and it has worked wonderfully for us, I’ll be doing a blog post about it soon but just haven’t had the time yet…lol. Keep on the lookout for it!
Hi Johnny,
Wondering if you were able to put together the blog post on your shower build? We are coming up to that point so just thought I would check.
Thanks a bunch,
Kris
Hey Kris,
I’d love to say yes, but I just haven’t had time to devote. Lots of irons in the fire. I will get to it as soon as I can. I will be glad to help any way I can if you start on your build prior to the video being done… 🙂
Was wondering where you purchased your t-seat from?
Hey Shaelagh, that would be an Amazon purchase. Here’s a link to it, https://amzn.to/2uh448e
Hi Johnny,
How big is the toilet you made exactly? Could you give me the dimentions please?
Thanks!
Marianne
Hey Marianne, The toilet dimensions are literally the same as any elongated toilet seat. I wanted as small of a footprint as I could get as well as something that was aesthetically pleasing.
Hi Johnny,
Yes, seems like you have a lot going on so understand not having done the shower blog yet. A couple of questions I have if you do not mind
1) Did you use any kind of water proofing sealant on the wood behind the sheet metal walls or just the sheet metal and then caulking?
2) What did you attach the sheet metal to the walls with?
3)
Any other quick tips would be greatly appreciated.
Cheers,
Kris
This is amazing! I’m curious what the total cost was for the completed toilet?
Richeal, thanks so much. The total cost was about $200. The majority of that cost is the urine diverter as it’s the only porcelain one available.
Hey! This looks awesome! Way better than 1000 dollars and still looks nice and is space saving!
I was wondering what liner you used for the bucket side!
Thanks!
Hey Kattie, sorry I took so long to reply to this. Yup, we’re really pleased with it and it’s held up pretty well. We used a standard kitchen trash bag and we double layered them. I wouldn’t recommend using anything super cheap as the results of a failure could be well… shitty… lol
This is a very nice build! I have been reluctant because I don’t like that most diy composting toilets look like outhouses. I’m wondering if you attach it to the wall at all? You mention you remove the bucket from the back so just wondering how it stays put. Thanks for a great idea!
Hey Natalie, thanks for the kind words, and sorry I took so long to respond. No attachment to the wall at all. It’s made out of wood so it’s pretty substantial and keeps itself down pretty well. We’ll be doing a 2.0 build sometime in the future so keep an eye out for it.
Sooo happy I found this! I didn’t want to spend so much money on an ugly compost toilet, but I also haven’t seen any built that I like either!!! This is gorgeous! The only thing I think I might want to do is taper the bottom so I could sit comfortably with my feet tucked slightly back. I’m not looking to buy a whole roll of sheet metal as I would have nothing else to do with it besides this, but I am totally sold on the porcelain urine diverter.
How would you recommend I get a small amount of sheet metal for this project? And I’m very concerned about cleanliness – how do you guys clean this toilet? It would certainly need to be cleaned like a regular toilet would… thanks!
So we were worried about the taper as well, but we haven’t missed it. As far as getting your metal, I would check with local metal roofing companies and ask if they have any cutoff or end roll you can purchase. RE: Cleaning, the toilet is 100% coated with epoxy which allows for fastidious cleaning.
– Johnny
Hi Johnny, Love the loo you made. You mention that you’re working on making a version 2.0 build sometime in the future. Am curious to know what you would change.
We ABSOLUTELY will be doing a 2.0 version… soon… I hope. There are some things I would definitely change and want to address in the second build, but overall it’s been a super functional potty!