diy composting toilet

Building Our DIY Composting Toilet – A Crappy Situation

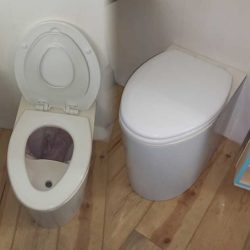
WHY SPEND THOUSANDS?BUILD YOUR OWN COMPOSTING TOILET COMPLETE WITH URINE DIVERTER The fact is the toilet is one of the most used pieces of, let's call it, "furniture" in the house. When we start talking about the toilet for the Wanderlust Bus we wanted to make sure whatever we chose would meet some specific requirements. The Read more about Building Our DIY Composting Toilet – A Crappy Situation[…]

Register Your Bus without Conversion in Any State

Any State, Any State of Conversion, Any Year, Make or Model of BusDMV LINKS UPDATED 2/16/2021 We're going to talk about how to register your bus without conversion today. Let's start things off by doing a little visualization.... You've bought the bus, you've started ripping out seats and things are going well. So you start to Read more about Register Your Bus without Conversion in Any State[…]
bus sink & counter installation

Wanderlust Bus Sink & Counter Installation: Let This Sink In

Now that all of the plumbing is buttoned up on the interior (video and post), we're going to be handling the bus sink & counter installation in the loo of the Wanderlust Bus. Our handy neighbor, Dwayne, happened to have a thick 100-year-old barn timber laying around the woodshop and he was glad to donate Read more about Wanderlust Bus Sink & Counter Installation: Let This Sink In[…]
bus interior plumbing

Wanderlust Bus Interior Plumbing with Aquatherm – Pipe Dreams: Pt 1

We've been talking about it, alluding to it, referencing it... the time is finally here for you all to SEE it. I'm talking about the Aquatherm pipe that we are installing. Yes, the bus interior plumbing is finally starting to go into place. With the walls floors and ceilings all covered in pristine beetle-kill pine Read more about Wanderlust Bus Interior Plumbing with Aquatherm – Pipe Dreams: Pt 1[…]
bus window installation

Wanderlust Bus Window Installation – Lookin’ Through the Windows

The entire interior skin is now completely covered in beetle-kill pine (floors, ceilings & walls) but there are still a whole bunch of gaping holes in the side of the bus where the windows are supposed to be. Well, we get to solve that problem today with the bus window installation! The old windows were Read more about Wanderlust Bus Window Installation – Lookin’ Through the Windows[…]
bus interior wall installation

Wanderlust Bus Interior Wall Installation – Up Against the Wall

Now that the floor is attached (post / video) and the ceiling is in (post / video) we can move onto the last piece of the interior frame skin, the bus interior wall installation. Of course, like everything else in this project, it's a little more complicated than just cutting things to size and slapping them on the wall. "We Read more about Wanderlust Bus Interior Wall Installation – Up Against the Wall[…]
bus ceiling installation

Wanderlust Bus Ceiling Installation: Gold on the Ceiling

The next step in our interior build-out is the bus ceiling installation. After the floor (here) and the closet build (Part 1 & Part 2) we address the We gave it a lot of thought, as we do every project we undertake and weighed a lot of options. We could use the ¼" birch ply and bend it Read more about Wanderlust Bus Ceiling Installation: Gold on the Ceiling[…]
modular closet

Wanderlust Bus Modular Closet Build: No Skeletons in This Closet Part 2

The measurements are taken, the closet is skinned (check out the post of skinning the closet here or go straight to watching the video here) and now it's time to move onto putting up our modular closet framework. This framework will eventually house everything we need to store. This space is not only our closet Read more about Wanderlust Bus Modular Closet Build: No Skeletons in This Closet Part 2[…]
bus closet construction

Wanderlust Bus Closet Construction: No Skeletons in This Closet Part 1

Once we accomplished the flooring (which you can see in the post here or head straight to the video here), it was time to start addressing where we are going to store our stuff and prepare for the bus closet construction. If you take a look around your home, you'll notice something in almost every room. In Read more about Wanderlust Bus Closet Construction: No Skeletons in This Closet Part 1[…]
Ponderosa Pine Flooring Installation

Beetle-Kill Ponderosa Pine Flooring Installation: Pining for the Floors

With the dashboard project done  (well, mostly - see the video series here)I can now move on to the next step in this crazy journey and that is the blue-stained, beetle-kill, ponderosa pine flooring installation. We got this flooring months ago at a small local lumber mill near our home base in KY (check out Read more about Beetle-Kill Ponderosa Pine Flooring Installation: Pining for the Floors[…]
bus dashboard installation

Wanderlust Bus Dashboard Installation Part 2: Paradise by the Dashboard Light Part 5 of 4

Before we jump right into today's post, if you missed the other episodes of our 5 of 4 part bus dashboard installation series, Paradise by the Dashboard Light, here are links to all the previous episodes. Dash Removal Dash Construction Prefinish Install Part 1 Now, with that out of the way, we can move on Read more about Wanderlust Bus Dashboard Installation Part 2: Paradise by the Dashboard Light Part 5 of 4[…]
bus dashboard preliminary installation

Bus Dashboard Preliminary Installation – Paradise by the Dashboard Light Part 4

BUS DASHBOARD PRELIMINARY INSTALLATION Once we've accomplished the tear out (check out that video here), the construction of the components (here), and the EcoPoxy finishing of those components (here), we can move on to the bus dashboard preliminary installation. Before we start doing the bus dashboard preliminary installation we need to do some final finish Read more about Bus Dashboard Preliminary Installation – Paradise by the Dashboard Light Part 4[…]
bus dashboard pre-finish epoxy

Bus Dashboard Pre-Finish Epoxy – Paradise by the Dashboard Light: Part 3

Now that we've got the dashboard ripped out (see part 1 of this series here) and we've constructed all of the new dashboard pieces (see part 2 here), we can now focus on what I'm calling the "bus dashboard pre-finish epoxy kerfuffle." Some of the pieces we've built will be virtually impossible to access to Read more about Bus Dashboard Pre-Finish Epoxy – Paradise by the Dashboard Light: Part 3[…]
bus dashboard construction feat

Bus Dashboard Construction – Paradise by the Dashboard Light: Part 2

The old dash has been ripped out and made a thing of the past. With that completed (check out the tear out in Paradise by the Dashboard Light: Pt 1) we can move onto the bus dashboard construction portion of our project. I saw someone on social media refer to some of us building with large Read more about Bus Dashboard Construction – Paradise by the Dashboard Light: Part 2[…]
bus dashboard removal

Bus Dashboard Removal – Paradise by the Dashboard Light: Pt 1

This is the first of a four-part series focusing on the Wanderlust Bus dashboard. Part 1 is all about the bus dashboard removal. When you first look at the dash of a highway coach, it's a lot to take in. Frankly, it's downright frightening; but understand that assessment of your situation will help make your bus Read more about Bus Dashboard Removal – Paradise by the Dashboard Light: Pt 1[…]
interior cabin insulation - featured

Baby, It’s Cold Outside… Interior Cabin Insulation in The Wanderlust Bus

With temperatures at our home base beginning to plummet, it was now time to address the interior cabin insulation. We need to be able to keep the interior cabin climate controlled not just to keep us warm as we work, but more importantly, so that when we apply the EcoPoxy to all of our wood Read more about Baby, It’s Cold Outside… Interior Cabin Insulation in The Wanderlust Bus[…]